How to install Samsara
You have downloaded a ZIP file. This page takes you from that file to Samsara running on your computer. There is a picture for every step.
The pictures were taken with v0.30.0-beta.1. The steps are the same for any Samsara ZIP — only the version number in the file name changes.
-
Find the file you downloaded
The file is called
Samsara-Windows-v0.30.0-beta.1.zip. It is about 570 MB.Two ways to get to it:
- Open File Explorer and click Downloads in the list on the left.
- Or, in the browser you downloaded with, click the download button near the top right, then Show in folder.
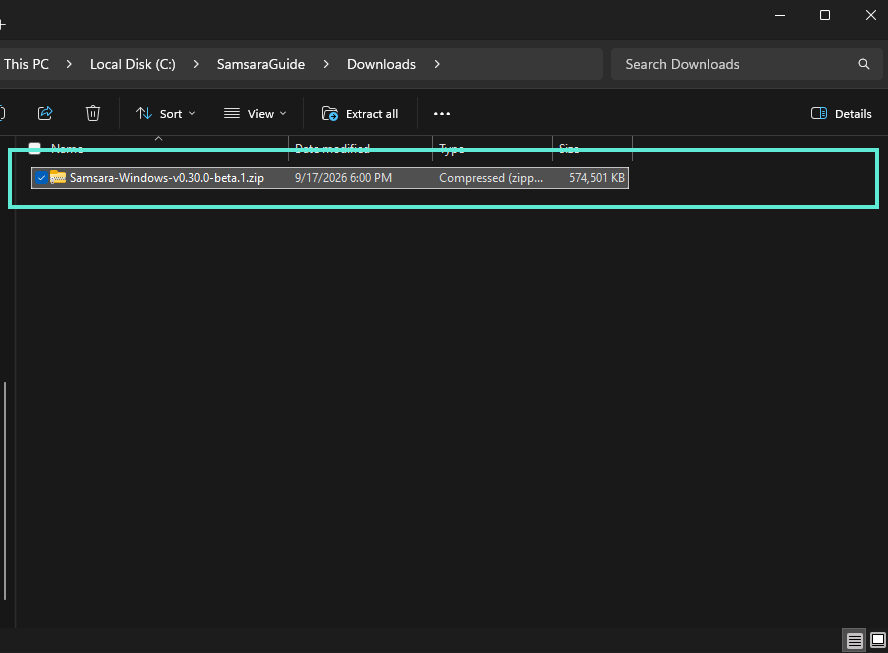
The downloaded ZIP in File Explorer. Click it once to select it. -
Unpack the ZIP
A ZIP is a box. Samsara will not run until you take it out of the box.
Click the file once to select it, then use whichever of these suits you:
- Click Extract all in the bar along the top of the window.
- Or right-click the file and choose Extract All… — on Windows 11 you may need Show more options first.
- Or, without a mouse: select the file and press Shift + F10 (or the Menu key), then choose Extract All….
A window opens asking where to put the files. The folder it suggests is fine. Click Extract.
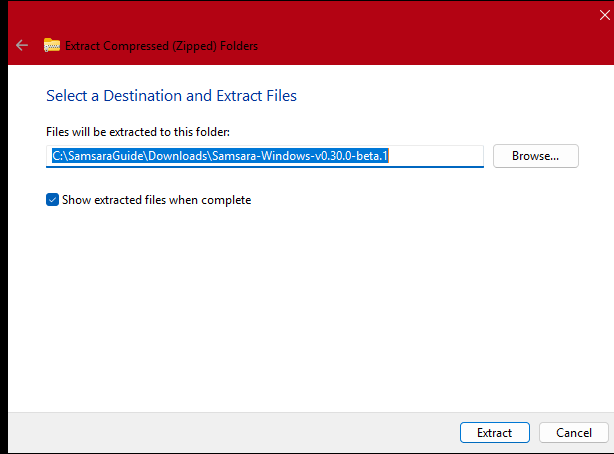
Leave the folder as it is and click Extract. Unpacking takes a minute or two. Do not run Samsara straight from the ZIP window. If you double-click the ZIP you can see
Samsara.exeinside it, and opening it from there looks like it should work. It will not. Samsara.exe needs the_internalfolder next to it — 7,740 more files, 1.4 GB unpacked — and opening it from inside the ZIP copies only that one file somewhere temporary, without them. Extract first, then run it from the extracted folder. -
Open Samsara.exe
When extracting finishes, a folder opens containing Samsara.exe and a folder called
_internal. Leave_internalalone — Samsara needs it.Double-click Samsara.exe.
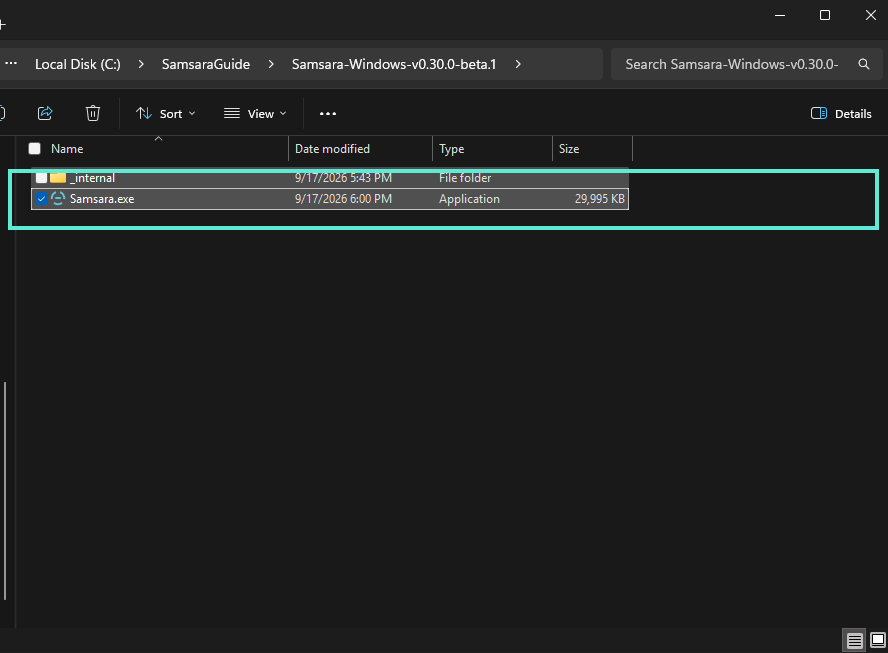
The extracted folder. Double-click Samsara.exe. -
Get past the Windows warning
Windows will probably show a blue box saying “Windows protected your PC”. This is expected.
Click More info, then click Run anyway.
Why it appears: Samsara is not code-signed. A code-signing certificate is a paid yearly subscription, and Samsara is free software funded by one person. Windows shows this box for every app that has not bought one, whatever the app does.
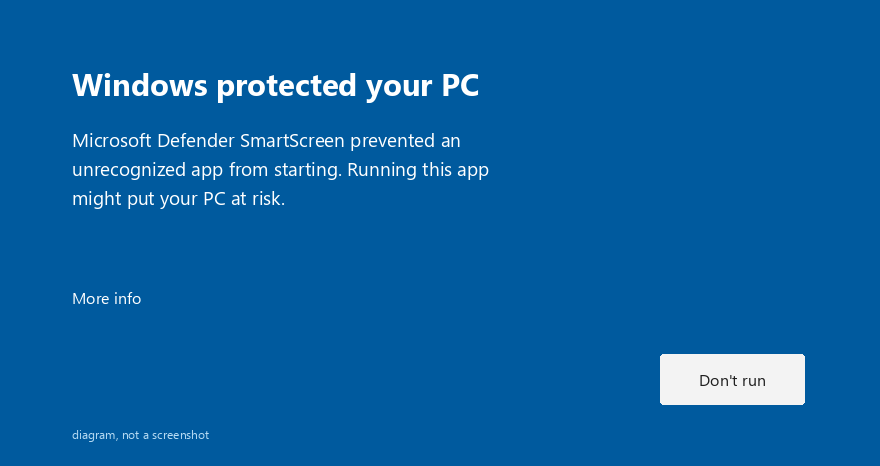
This one is a drawing, not a screenshot. SmartScreen is switched off on the machine these pictures were taken on, so there was no real dialog to photograph, and we do not fake screenshots. The wording and the buttons are the ones you will see. 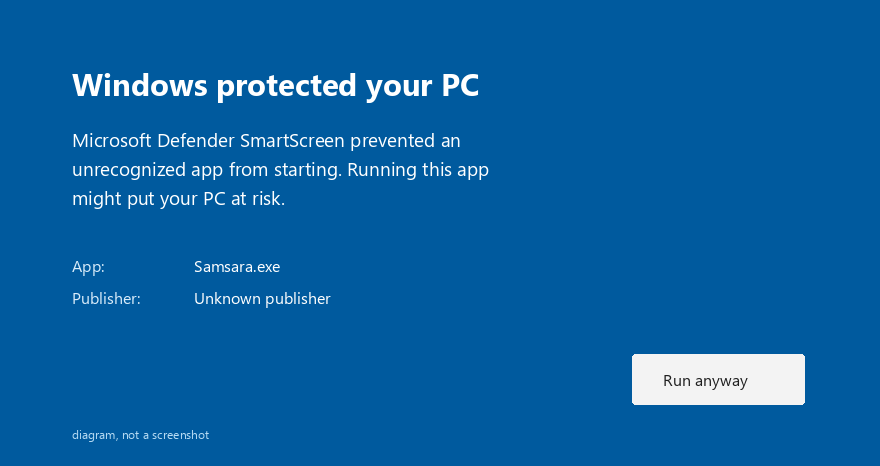
After More info, check that the app is Samsara, then click Run anyway. -
Work through setup
The first time Samsara runs it asks you seven short questions. Every answer can be changed later in Settings, so do not worry about getting them right now.
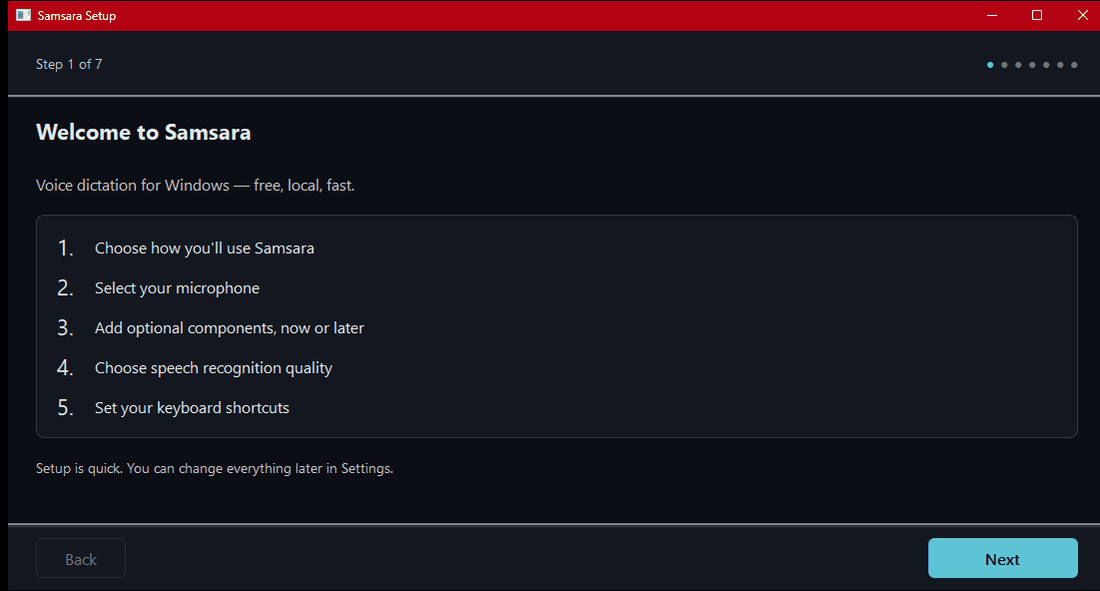
Step 1 — Welcome
A list of what is coming. Click Next.
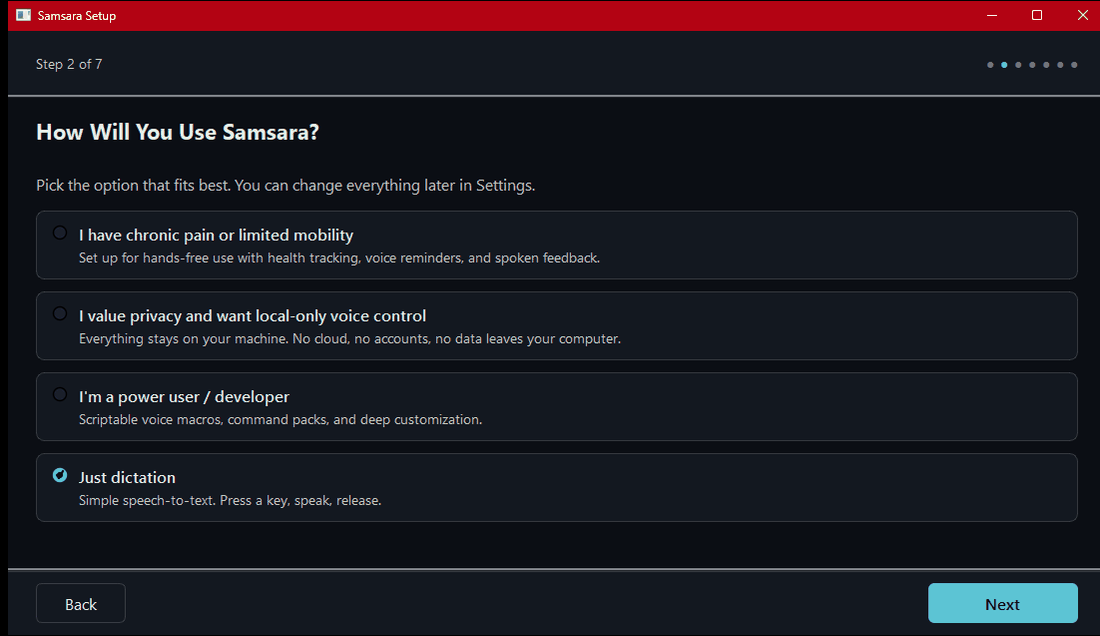
Step 2 — How will you use Samsara?
Pick the description that fits you best. It sets sensible starting options; it does not lock anything.
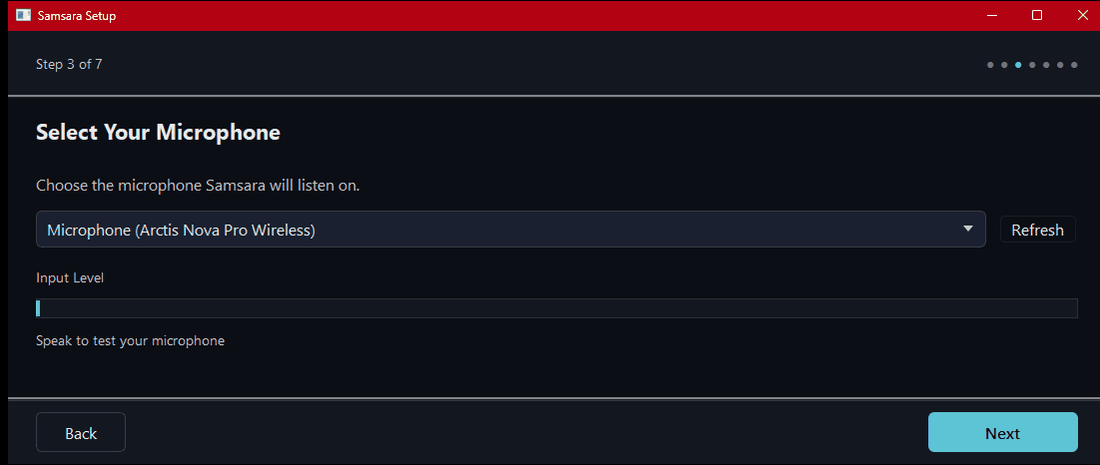
Step 3 — Select your microphone
Choose your microphone from the list, then speak. The Input Level bar should move. If it does not, pick a different microphone and try again.
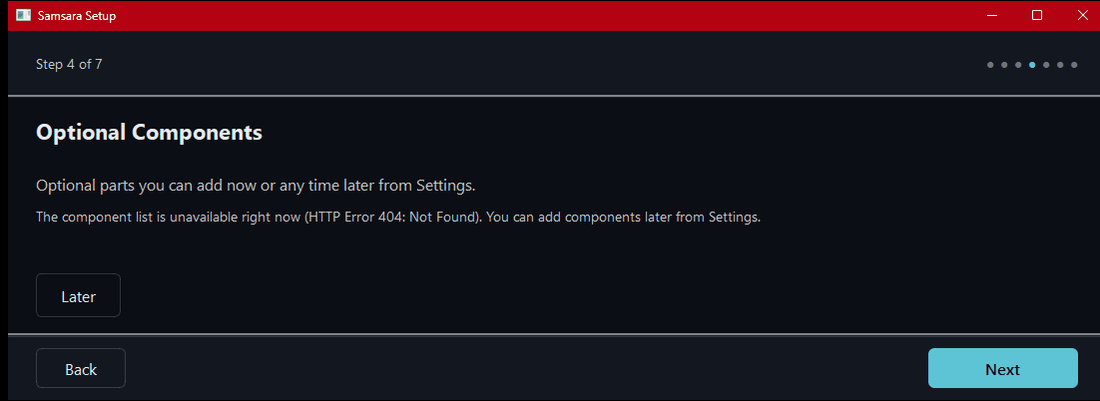
Step 4 — Optional components
Extras you can add now or later. Skipping them all is fine.
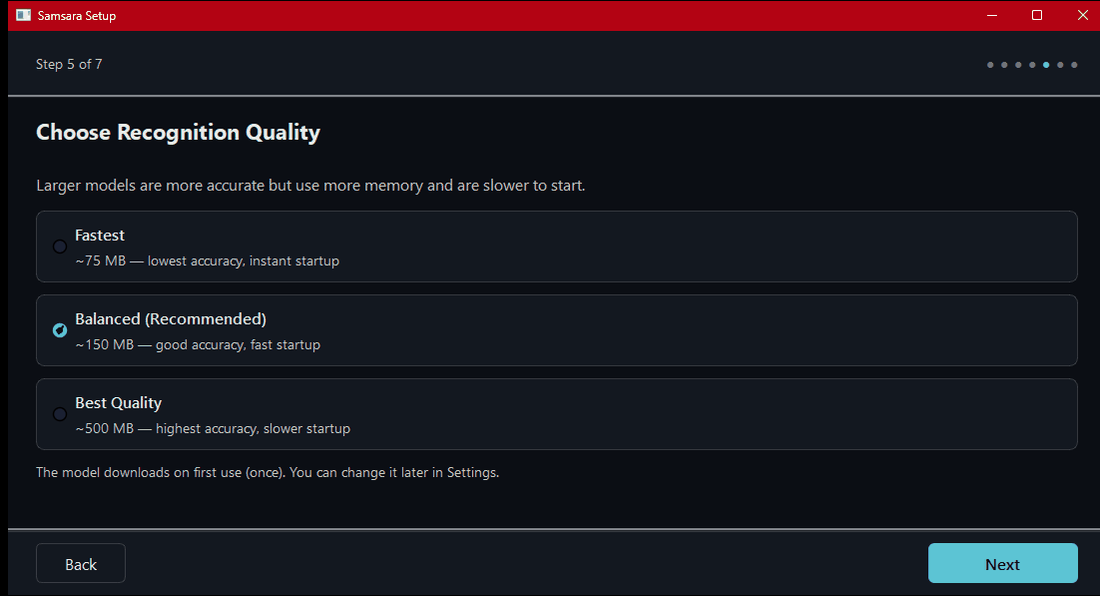
Step 5 — Recognition quality
Bigger models are more accurate and slower. Balanced is the default and is a good starting point.
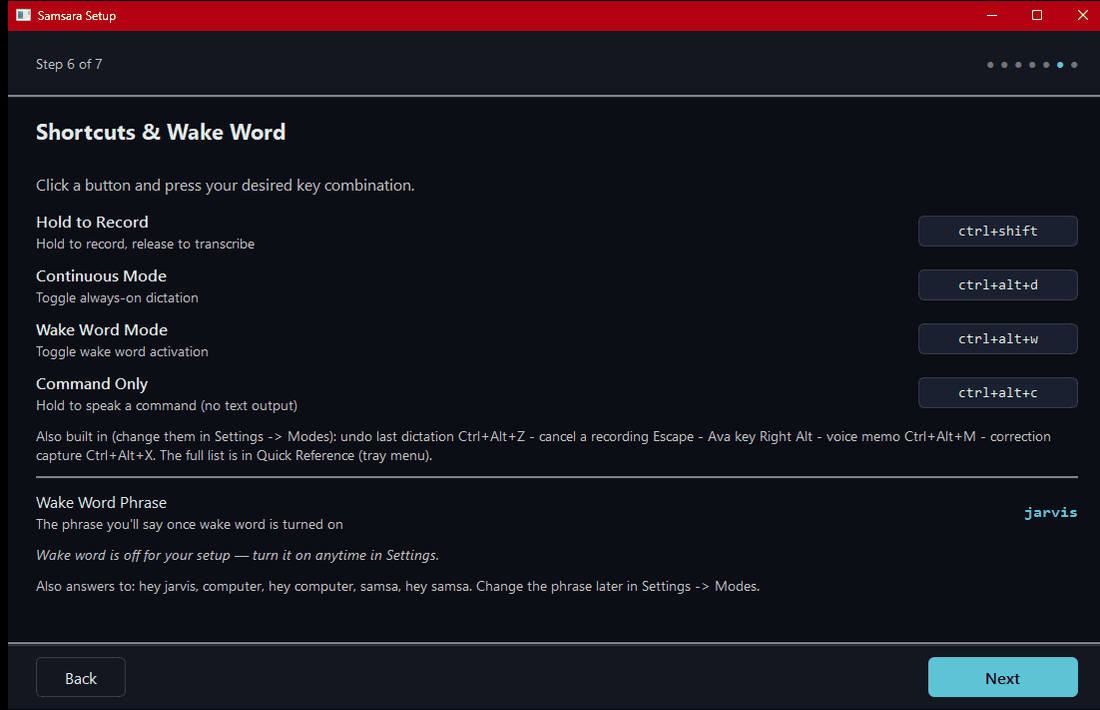
Step 6 — Shortcuts and wake word
The keys you will press to talk. The defaults are Ctrl + Shift to dictate and Ctrl + Alt + D for continuous mode. If a key combination is already used by something else on your computer, change it here.
Step 7 — Done
A summary of what you chose. Click Start Samsara.
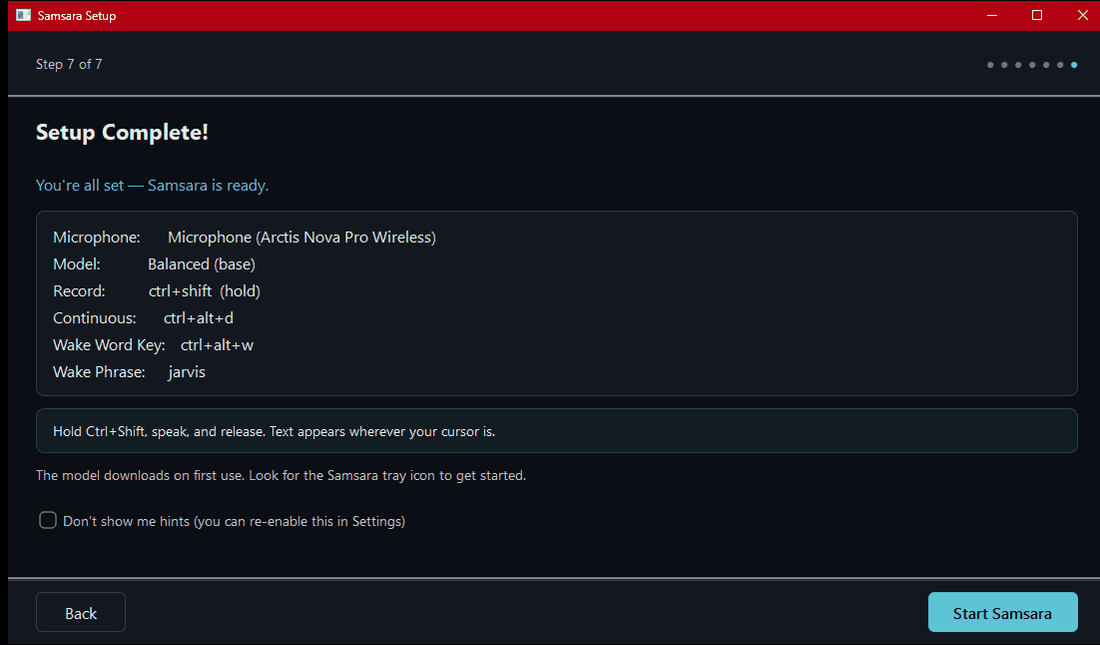
The speech model downloads the first time you use it. The first sentence you dictate may take longer than the ones after it.
-
Put it on your desktop (optional)
Samsara runs from the folder you extracted. If you would rather not go looking for that folder every time, make a shortcut:
- Right-click Samsara.exe.
- On Windows 11, click Show more options.
- Choose Send to, then Desktop (create shortcut).
Do not move
Samsara.exeitself out of the folder — it needs the_internalfolder beside it. The shortcut is a pointer; the program stays where it is. -
It is running — now what
After setup finishes, Samsara opens its main hub window and the first-run tutorial. It also stays available from the system tray.
- To dictate: hold Ctrl + Shift, speak, and let go. The text appears wherever your cursor is.
- To find it: look for the Samsara icon in the system tray — the small icons at the bottom right of the screen, next to the clock. You may need to click the arrow to show hidden icons. Right-click it for settings.
Stuck?
Nothing here is a silly question. If a step did not go the way this page says it would, the support page lists the things that most often go wrong and how to get in touch.